|
|
|
Presentation Two
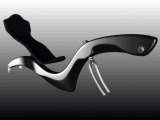
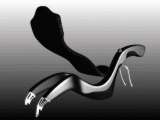
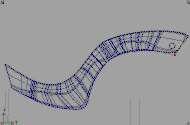
Here are some renders of my first recumbent model. It is a long wheelbase recumbent..
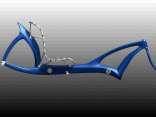
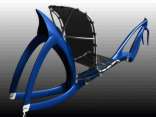
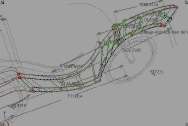
Here are some renderings of what I have done so far on the new short wheelbase frame.

It may not appear at first glance that I have done much since my last presentation. That is not the case. Since my last presentation I have completely rebuilt what I had done before as well as added to it. However, this project is taking alot longer than I had originally anticipated. It seems like it will become a semester long ordeal since I plan to include animations and I have not finished with the model yet. This is not a problem. For me to do what I want with this model I am willing to devote as much time as necessary.
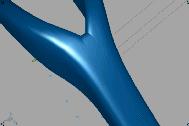
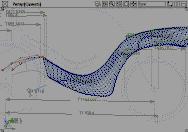
The first problem that I had after my first presentation was inherent in the model I had created. While trying to construct a cap at the tip of the boom (the boom is thte part of the frame that justs out in front and carries the bottom bracket and cranks) I was having alot of trouble so I questioned Steve about it. Upon his inspection, he informed me that I had a serious problem somewhere and suggested I rebuild it. So thats what I did. I took an entirely different approach this time. Instead of using square surfaces or rail surfaces, I just used skins. I don't want to go into all of the trouble that I had before this working with squares, rails etc because it would take the whole classtime. Suffice it to say, I spent a loooooong time working on it.
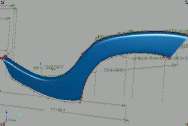
At this point I had intended to put in some little concavities to improve the lateral stiffness and add some visual appeal. After trying various ways of doing that and not getting good results, I decidedto modify my design. I used the same method as above, but since the cross section is not a simple rectangle and did not have uniform distribution of isoparms, I had to do a little cv modification.
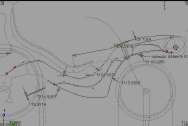
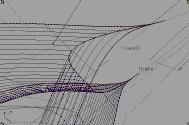
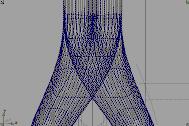
The main problem with the surface was at the junction of the boom and mainframe. The surface was not uniform and had some ripples in it as can be seen with the highlights diagnostic shader. As I said before I had to do some cv modification. To do this I used the Proportional Modification tool found in XForm under Modification. It allows the user to pick a cv and set how many cvs in both U and V directions are affected when it is manipulated. The user can also set how much those cvs are affected PROPORTIONALLY. This tool came in quite handy.
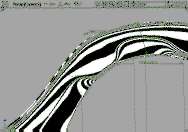

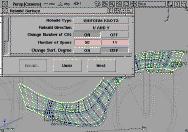
After manipulating cvs until the surface looked about as good as it was going to, I decide to use the surface rebuild tool on it to even out the isoparms. I knew that I would prevent alot of problems by doing this. I had to fiddle around with it alot to find out what number of cvs to rebuild it into without disturbing the surface too much. At certain numbers the surface would develope weird little ripples in it.
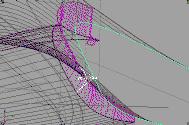
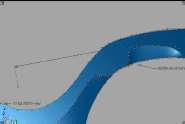
The next problem involved the seatstays. I didn't have any real trouble constructing them. I did it just like the frame including rebuilding them to the same parameterization as the frame. I had planned on modeling an outside half and an inside half and then attaching each to the corresponding part of the frame. Once that was accomplished I detached the part of the FRAME that was attached to the inside of the seatstay, grouped ALL pieces of geometry together and then mirrored it. That gave me both sides of the frame and both sets of seatstays with the two inside pieces overlapping in the middle. Then tried to intersect the two inner pieces so that later I could trim out the overlapped parts and have a nice seam down the middle on which to put a fillet. When I tried to do that, I got some crazy curves on surfaces.
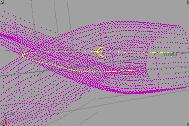
Obviously, I could never get these surfaces to trim properly so it ocurred to me that curveson surfaces have edit points just like other curves and that I might be able to select and delete them. I tried it and its possible. Despite the fact that the curves LOOKED good, the computer still did not like them. In fact it crashed anytime I tried to trim with the modified curves.


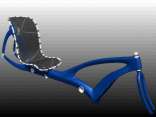
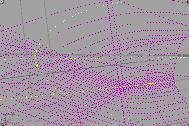
The next strategy I tried was to project a curve from the top onto the two overlapped surfaces. This worked very well. After achieving a good curve on surface and trimming it, I used tried to put a fillet round on it. Didn't work. Next I tried using circular offsetto trim away sections to use as rail surfaces. The rail surface didn't work either so I just skinned between them and used a boundary surface to fill in the triangluar sections. It didn't look as good as I wanted, but it worked. It really doesn't matter anyway because the only way I can get it to stitch is not to have any intermediate surfaces, just the sharp junction between the two inner sections.